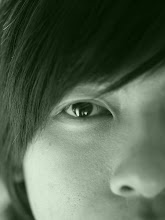
I brought my DSLR along, thinking I might encounter some wildlife, hence a long lens would prove to be useful, but at the same time I told myself to use only film in this trip. The truth is I did, I never pulled my DSLR out from my bag, even though I encountered some birds. My wife took the birds on my behalf on her Panasonic Lumix GF1... haha... This is something I have never done before, using film entirely on an outing.
Many things could have gone wrong, for example, if my film was not properly loaded, it will not advance properly and I would have wasted an entire roll of film, wasted my time and effort. The camera I'm using is fully manual, so the film has to be manually advanced for the next exposure.
Fortunately, nothing went wrong.
I brought 3 rolls of Ilford HP5 plus ISO 400 film for my black and white photos. I have never used them before but my research states that they provide vintage black and white look, meaning there will be some grain. For those who are wondering, the grain is totally different from digital grain which are not pleasant at all. I wanted to try it out on something worthy, so it makes sense to go out and shoot some landscapes and not waste it on shooting inside KMART... or my messy home/room... haha...
Now, let's get to the photos:
Its common to see sheep, cows or even horses grazing along the highway.
Destination: Bicheno and the area is also known as BLOW HOLE
This is why the place is called the BLOW HOLE, sea water can splash upwards caused by the cavity in the rocks.
Destination: Coles Bay
Destination: Swansea
And finally a picture of my wife posing on the beach... haha...
When I just received my prints today from the lab, some of the prints didn't turn up that well, they were a bit soft and the contrast were low, I just wasn't satisfied with the look, even though they were printed on Black and White paper, whatever that means. That's the thing, whatever that is captured on film, that's it, not much room for error, unless of course you print the pictures in the darkroom by yourselves, then you can chemically alter it a bit.
I decided to scan the negatives to see if there are any differences, and I found out they look better scanned on the monitor as I can correct whatever flaws on the negatives, dust, scratches, water mark, crooked horizons, brightness and even contrast to get the look I want. So most of them were keepers for me if they are scanned and digitally enhanced.
As for prints, I think I will just ask the labs to develop the negatives and I could just scan them after that. This is not only a much cheaper way, but I can correct whatever that need corrected. If I want prints, they will only be the best ones that are good enough worthy for enlargements. I have less prints but they are only the good ones. However, this way is also more time consuming because scanning takes a lot of time, not including the time to edit the pictures. But in the end, it's all worth it as I really like the film look of the Ilford film as it is so different from the clean and sterile look we get from digital files which seem to lack character even though they may have better resolution. Its a personal thing I guess... I will soon test some pro colour film. I have some Fujicolour Pro 400H yet to be tested, so come back for that...


0 comments:
Post a Comment